Saturday night hockey

Saturday night hockey

Friday, October 23, 2015

A finished quilt for Blogger's Quilt Festival

Even though I wasn't much of a dedicated blogger this summer I did do a little bit of sewing.  Most specifically I finished a quilt!  My sister came over for a visit from Australia and since this quilt was destined for my nephew in Australia, it made sense to get er done and send it back with her.

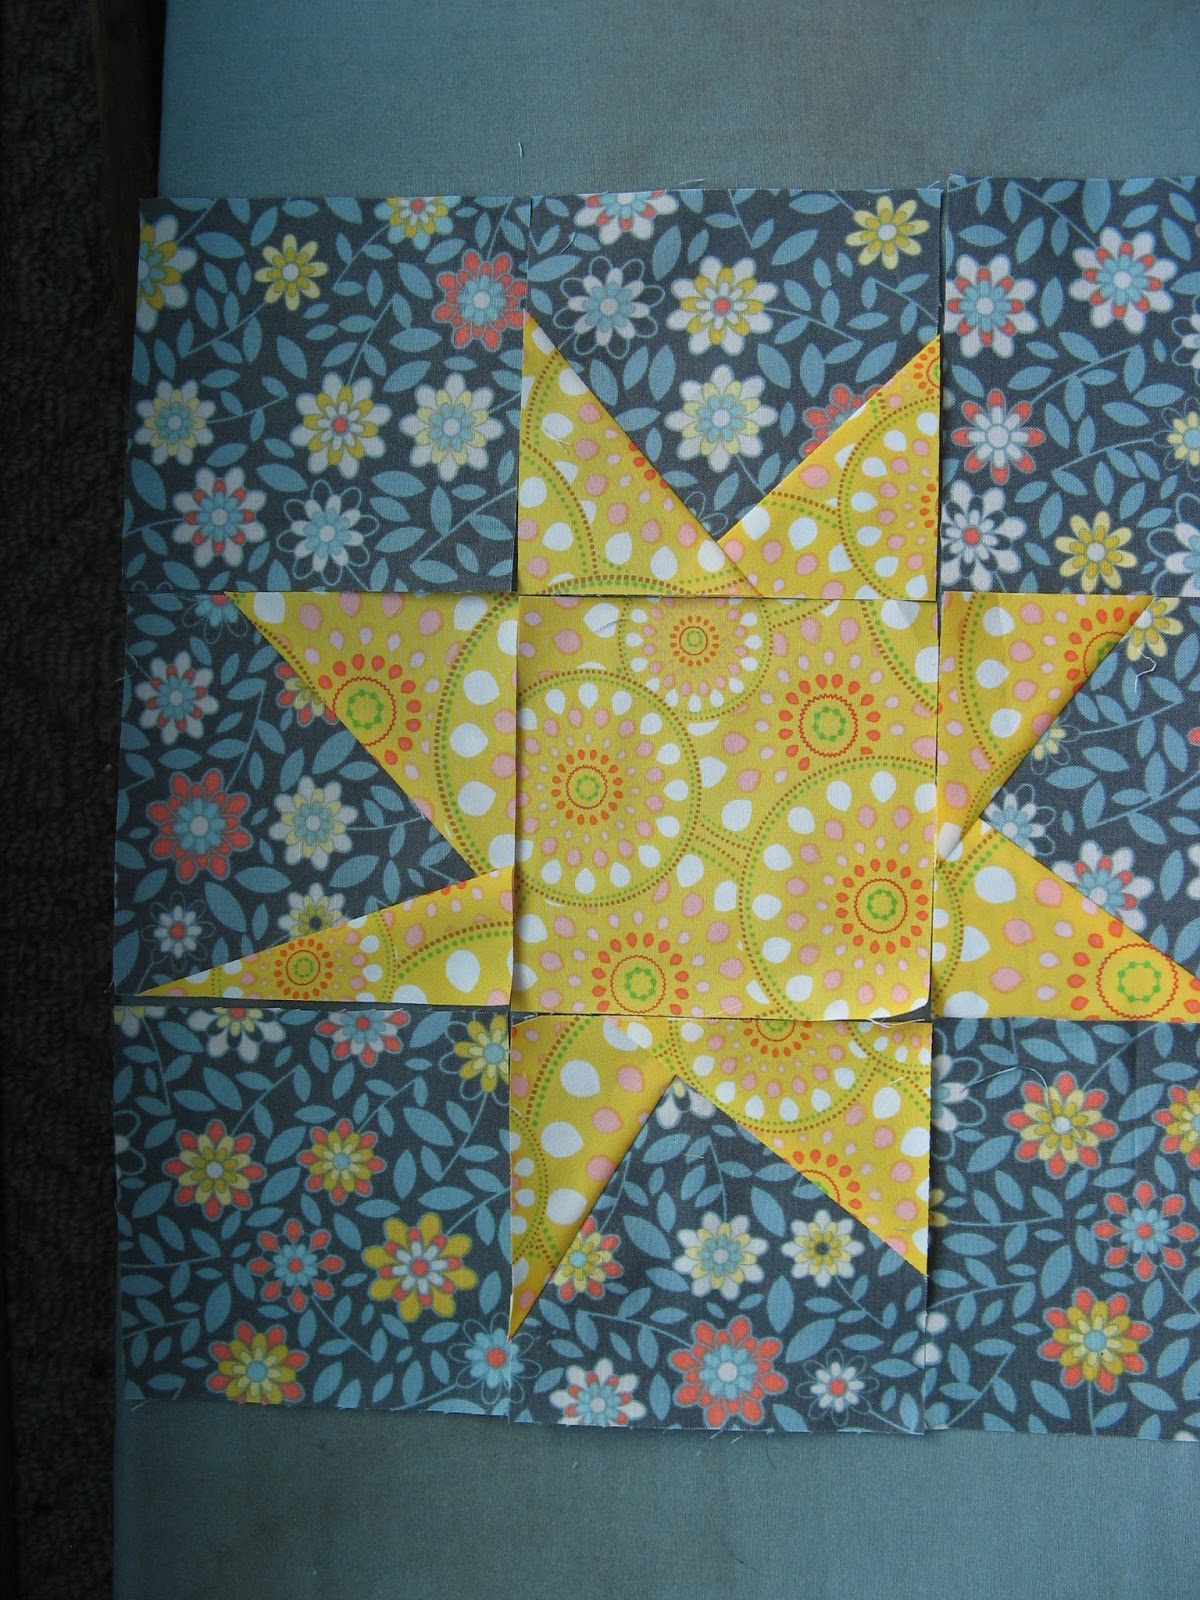
The starting blocks (pun intended) for this quilt were gathered during the Simply Solids bee on Flickr that I participated in.  I was in the Carmine group - all quilters from Canada.  Here is my sample block.

And the other eleven made by my bee buddies.


I added three more blocks - because my nephew is tall and I wanted the quilt to be long enough for him.  I added a tan background so that the pretty colours would pop out like jewels.  And I quilted the quilt on my Bernina, using flowery patterns to pretty up the plain.


Some close up quilting pics....


I used a piece of fabric for the back that I had bought some years ago just because I loved it so.  It needed a couple of strips added to the sides to make it the right size.


It's a bit difficult to see in the photo - fishing, kayaking, rafting and swimming in the river.  The river of your choice.  :)

My nephew plays music, works at gardening and loves the outdoors.  Here is the label for his quilt.


 I hope you have enjoyed this visit with my nephew's quilt.  Please go to Amys Creative Side to see all the entries in the Bloggers Quilt Festival, to comment for a chance to win, to add your own entry and to vote in the many categories.  I am adding my quilt to the Original Designs category.

Janet 

Saturday, October 17, 2015

Friday Night Sew In Report

For Friday Night Sew In this month I put the second round of hexies on one of my hexie flowers.


Not a ton of sewing but every bit helps.  The hexie quilt is coming together slowly, but it is coming together!

Hope you had a productive Friday Night Sew In.  Go here to see what everyone else did!

Janet 

Tuesday, October 13, 2015

Obsession!!

When I was looking around on-line for an idea for my block request for the Canadians Quilt bee, I came across a block that really caught my fancy.  It wasn't the right block for me to request from the bee buddies - aside from the fact that it finished too large, it is composed of 84 individual pieces....

But I couldn't get it out of my mind and so I made me a block.  The block is called "Octagonal Orb Block" and it was designed by Elizabeth Hartman of the Oh Fransson blog.  She did a tutorial for the Modern Quilt Guild blog found here.

Here is my block....

So now I have to figure out what to do with it.  It is over 16 inches square, so a bit big for a bag and I don't want a wall hanging.  I guess I will just have to make some more of these squared and turn it into a quilt!  :)  I have already cut out the pieces for a yellow block and I think I'll make two brown ones - one a darker brown and one a rusty brown - and a red one.  There is a bit of a fall theme going on in my mind.  The problem is that I used a grey that I only have a small amount of .  What to do?  Do I use a different grey or try to figure out where this one came from and get some more.  It is NOT a Kona solid - I already checked.  Please give me some feedback on this one!

In wild animal news: we have had three families of grizzly bears hanging out along the road that I travel daily to go to work.  The other day I saw one of the families close to home so took my camera out for an (unsuccessful) shoot.  I did get this one photo that allows you to see that there is a mama and two one year old cubs.  They are all big and roly poly ready for winter so it is impossible to tell who is who.

My friend Mike was driving down the highway just after I was there and he did get a good shot of one of the bears.  Aren't they beautiful!


I seem to have forgotten my password for Windows Live Writer and I am having to use Blogger to write my posts.  It just isn't as versatile, friendly or fun!  Does anyone use Live Writer and know how one can go about resetting the password on it?  What do you all use for writing your blog posts?

Janet 

Saturday, October 3, 2015

Wonky Star Block Tutorial for my Canadians Quilt Bee Buddies

Let me start by saying that I did not invent the wonky star block.  It has been around for a long time and you may have made one in the past.  This tutorial is not original – I read quite a few before I made my block and was influenced by others methods.  I do need to give a shout out to Jane at Jane's Fabrics blog as she demonstrated one part of the method that I liked and used.  I’ll let you know when we get there. 

I also have to say that my block idea is not original.  I took a look at the link that Lisa provided to Stash Bee’s post on fun blocks to use and I really liked the look of one by Jolene from Blue Elephant Stitches blog.  I don’t have her permission to copy the photo of the quilt but you can see it here.

So I would like you to make me a 12.5 inch (12 inch finished) Wonky Star block.  I would like you to use colour.  I love colour.  Please don’t use solids or tone on tone fabrics.  Please don’t use anything that is predominantly black, white or brown, although it is fine to have these colours in a fabrics that is predominantly some other colours. 

Here is my pile of fabric as I played around figuring out what I was going to use.

In the end I decided on these two…

The one on the top is Silent Cinema by Jenean Morrison from Westminster fabrics.  I loved this line when it came out and bought a few different colour ways of the different fabrics, but I haven’t used it much.  The one on the bottom from Art Gallery Fabrics Sugar Collection and is called Feel the Difference.  It is my favourite fabric right now and I am always wanting to use it.  Good thing I bought a few meters of it. 

Enough rambling.  Here’s how to make the Wonky Star block.  Cut eight 4.5 inch blocks from whichever fabric you are going to use for the background and five 4.5 inch blocks from whichever fabric you are using for the star.

Cut four of the star fabric blocks in half diagonally – only four, leave the fifth one intact.

Place four of the background blocks out right side up and place four of the star triangles right side down on the blocks like so…


You notice that they are all different?  This is what will make the star wonky. 
When you are laying your triangles out flip them over to see how they will look once sewn to make sure you like how they look.

One of my blocks was problematic because when I flipped it over it looked like this… Do you see how far to the left the yellow fabric is on the bottom. This did not make for an attractive point on the star.


Another one was a problem because when the yellow was flipped over it did not completely cover the 4.5 inch block. 


Sew across the long edge of the triangles using a 1/4 inch seam.  Press the star fabric open.

Now place your second set of four triangles face down on the four blocks like so…  flip the triangles over so that you will see what they look like once sewn again.  This will prevent having to do any reverse sewing. 

Sew again along the long sides of the triangles using a 1/4 inch seam and press open.

Now this is the part that I got from Jane.  You notice that we didn’t trim any of the background fabric before adding the second triangle.  Now you can flip the blocks over – wrong side up – and use the original block as a guide to trim back the star points.


Trim all four star point squares to 4.5 inches then use your small scissors to cut away the excess background fabric.  I don’t know if this is really easier and if you are an accomplished wonky star maker and want to do it the other way, well please do. 


Lay out your nine squares thusly, putting the squares with the star points in a pleasing arrangement.

Sew the rows together, using a 1/4 inch seam. 

Press the two outside row seams out to the side blocks and press the middle row toward the middle block.  This will allow the seams to nest when sewing the rows together which is the last step.  Eh voila!!

A wonky star block!  I can’t wait to see what wonderful colours my peeps in the Canadian Quilt bee come up with.

Janet